Page Last Modified: 8/13/2000
On-Board Air System From Kilby Enterprises (York Compressor)
Back to Home Page
The kit from Kilby Enterprises includes brackets for mounting the York compressor, a replacement pulley for the alternator, a v-belt and 2 manifolds for the compressor. I also bought a new York Compressor from Kilby for $225.
The compressor installation took a couple of hours and was very easy. TJ's with body lifts will probably have to cut the inner fender, but it wasn't necessary on mine (no body lift). The bigger job was finding all the plumbing and electrical parts. The complete installation was simplified since I don't use air-lockers on my Jeep. The only purpose of the compressor is to power air-tools and provide air for the tires. And so far it has done that very well!


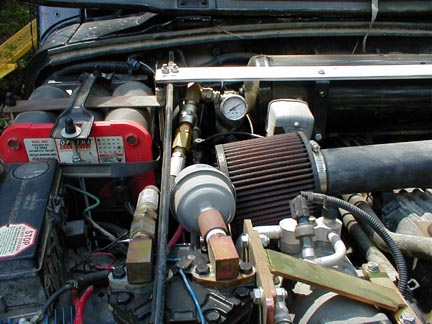
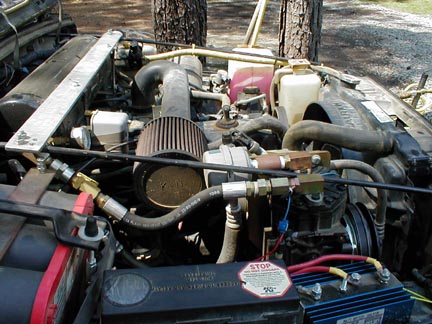
If you follow the plumbing, you can see the various components that make up the system. Start with the gray filter on top of the York compressor (compressor on the left is the York). Air comes in the gray filter, then into the manifold and compressor. Compressed air comes out the other manifold into a 1/2" hydraulic hose (8" long). From the hydraulic hose, the compressed air goes into a brass checkvalve. The checkvalve releases the built-up pressure in the hydraulic hose and compressor after the compressor finishes a cycle.
After the checkvalve is a 90 degree union, a 1/2"-3/8" reducer, then a 3/8" T-connector. The T-connector has a gauge that measures the pressure in the Sun Performance air-tank. The other end of the T-connector goes into a 90 degree union, then into the air-tank. The Sun-Performance air-tank is rated to 150 psi, but I've got the pressure switch set to a maximum of 120 psi. There is an adjustable relief valve installed in the backside of the air-tank (not visible above). The relief valve is set at 145 psi.


The Sun Performance air-tank is mounted to the support rods with two identical pieces of 1/8" aluminum (stacked on top of each other). The air-tank is actually mounted sideways with the air-tank mounting brackets facing forward. The aluminum straps are secured to the support rods with small u-bolts. The gray rectangular box is a Square-D pressure switch that screws into the air-tank. The pressure switch activates a relay that turns on the compressor clutch. The switch activates the relay when the pressure drops below 80 psi and turns it off when the pressure reaches 120 psi. There is a toggle switch inside the Jeep to prevent the system from activating when not in use.
This overhead view shows the entire air-tank installation.


On the driver's side of the air-tank is another 90 degree union that goes into another T-connection. The T-connection has another pressure gauge that measures pressure in the tank. This gauge and the gauge in front of the air-tank should always read the same. After the T-connection is an adjustable pressure regulator that controls the pressure going into the air hose. Although some air tools are sensitive to excessive pressure, I've got the regulator set to 120 psi. The gauge on the left measures the regulated pressure. Finally, there's a 3/8" air hose (yellow) attached to the regulator and secured to the support rod.
And for convenience, the 3/8" air hose connects to a quick disconnect through the grill (I drilled a 1/2" hole in the grill). Attached to the quick disconnect is a coiled 25' air hose. The hose will reach all 4 tires on my Jeep.
The various hoses, connectors and electrical parts came from Northern Tools, Grainger and my local NAPA store.
The performance of this setup has been excellent. I can air up a 33x12.50 Swamper from 0-30 psi in about 45 seconds and I've run various air-tools continuously with no problem.